Handy Color Code for Custom Values in Swift

So that RGB values can be entered in XCode in Swift (for example changing the background colour of a table view), place this UIColorExtensions file in your code:

import Foundation
import UIKit
func UIColorFromRGB(rgbValue: UInt) -> UIColor {
    return UIColor(
        red: CGFloat((rgbValue & 0xFF0000) >> 16) / 255.0,
        green: CGFloat((rgbValue & 0x00FF00) >> 8) / 255.0,
        blue: CGFloat(rgbValue & 0x0000FF) / 255.0,
        alpha: CGFloat(1.0)
    )
}

Then call it in your viewDidLoad() or wherever you want using:

        view.backgroundColor = UIColorFromRGB(0x209624)

Very useful for custom colors in Swift.

Rejecting the ‘9-5’ and Embracing Remote Working

Companies nowadays are trying to adapt to new ways of working. For many big corporations, this is an un-traditional approach, but one that needs to be acknowledged in order to obtain and keep the best people. This is a topic of interest to me, so I thought it would be an interesting one to discuss.

I work for a large corporation in London, but I live in Essex, with an average journey time of 2 hours each way (on a good day) which comprises of a drive, a walk, overground train, underground train and another walk. This can get pretty stressful and tiresome, and quite frankly can ruin my attitude towards work for a day if all goes badly. To combat this, I arrive at work between 7.30 and 8.00, leaving between 16.00 and 17.30 on an average day. Thankfully, my company are great with ‘flexi-time’ and are embracing this new culture of allowing remote working too, which is a complete god send: not only do I feel relaxed and well rested, but I usually end up working more productively and for longer because of this.

I have recently been discussing with several other ‘long distance’ employees at work (who are all earlybirds like me) and general attitudes towards this. The general attitude at my place of employment is just to go ahead with remote working until told otherwise. This makes a lot of sense – as long as we get our work done to the best of our ability and communicate with our team, being in the office when needed, what does it matter? My team have recently embraced ‘Remote Wednesdays’, where we will work either as a team or individually in a location of our choice, whether it be a coffee shop or at home, which has been working very well. Thanks to tools such as Slack, Github and Dropbox, we all have a continuous workflow with each other and ways to communicate – we all love it so far. Hopefully the higher ups in the business won’t disagree with us and take it away.

The main reason I wanted to write this post was to give some genuine insight into how customising your own work regime is working at my workplace, in case other people would like to embrace it also. So here are some bullet points into why working this way is great:

1. A different work routine isn’t an incorrect work routine

Just because someone isn’t at their desk 9-5 doesn’t mean they are not working. The most creative people almost never work from 9-5 – early hours seem to be a common theme. A lot of developers seem to prefer the night, starting late in the day and then working on/off throughout the night. Github is an interesting way to see how people work differently in teams.

Clock

2. Becoming a robot is not a good way to get rewarded

If you become that person who seems to live in the office, you will burn out. Working more hours is great if you really enjoy what you are doing, but everyone needs to know their limits and when to take a break. You may end up falling out of love with what you’re doing, or just become so exhausted that you cannot function. Either way, the best creatives and the most happy ones have a good balance. Getting in ‘the zone’ is much easier, and time will pass quickly by itself.

8hours

3. People need to be engaged

If you’re not engaged with what you are doing, you will get bored and lose your enthusiasm. Remote working gives us a good way to get out of ‘those’ meetings that dull your mind for the rest of the day. It is a known fact that the most creative people get bored and distracted easily if they are not stimulated, as their minds are always looking for something to occupy them. Giving them the freedom to choose their own working environment gets more out of the person and, therefore, gives more back to their company. A fun office environment is a plus too!

work

4. Risk taking is a part of life

We embrace the Agile methodology: fail fast. Try this way of working, and if it doesn’t work for you, it’s not the end of the world. You will learn from your mistakes, which is the most important thing. You need to accept failure in order to reach success and understand why the failure happened in the first place. It’s hard at first, especially if you work in a subjective area such as design, but you need to not take failure personally. Step up to the challenge and make it work.

creative

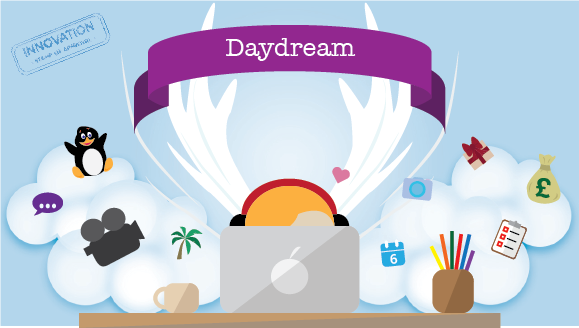
5. Daydreaming is important

It’s hard to daydream in an office with phones ringing and people rushing by. Headphones work to an extent, but it is extremely important to have the space and time to think. Daydreaming allows your imagination to expand and gives your brain some downtime. Thinking is so crucial, especially in the early stages of a new project, as it allows you to consider all possibilities, and the 5 minutes a day that you get some good quality daydreaming done may produce a big idea or approach that you never would have considered otherwise.

Daydream

So the rest is up to you. If there are any other personal reasons you feel for working your own way, let your employer know. They train you, they should be willing to make you happy enough to keep you. It is still a touchy topic at times, but we’re all human at the end of the day – no-one wants to see someone else crash and burn out. I write this while working remotely from my home, and it’s a brilliant thing to be able to do, and the creative juices have certainly been flowing today!

Note: All images are copyright to me – no usage without permission.

Setting up Homebrew, Node, Bower, Grunt & more

We use a variety of Homebrew, Node, NPM, Bower, Grunt and Compass in the majority of our web-apps to aid us with managing our packages and dependencies. From having messed this process up on my machine numerous times now, I am going to document this process so that it may help others in the future, as the Internet was not the most useful of places when I was trying to sort this out by myself. Luckily a colleague has saved the day for me numerous times, so to avoid annoying him further, here is our process 🙂

Note: This process is just to set up a clean install on our machines – I will explain further in another post how to get all of this working within a specific project.

Grunt

Step 1 – Install Homebrew

$ ruby -e “$(curl -fsSL https://raw.githubusercontent.com/Homebrew/install/master/install)”

Homebrew installs packages and then links their files for you. It is very important that you do this step before anything else so that you can then install packages through Brew, to save having symlink problems later on due to duplicate versions being installed. Install Brew wherever you like.

Step 2 – Install node

$ brew install node

Node.js is a platform built on Javascript’s runtime, great for building real-time applications. When you install node, it comes with npm, its package manager. Npm is great – through this we can install bower, grunt as well as many others that may be needed for future applications.

$ node -v

$ npm -v

Run these commands just to check that your current versions are up to date.

Step 3 – Install Bower

$ npm install -g bower

Bower is another package manager that manages your libraries, frameworks etc. This command will install Bower into your node_modules. Use  a bower.json file to list your packages and the versions that you want – Bower will take care of the rest.

Step 4 – Install Grunt

$ npm install -g grunt-cli

Grunt is a js task runner. Configure a gruntfile.js to automate your tasks using the many plugins available. This makes unit testing, real-time changes and minification so much easier. This task also installs the grunt command line interface.

Step 5 – Install rvm

RVM manages your rubies and shows which ruby your current shell points to. This step may vary for different people. You may need to install gpg (this verifies signatures and publishers) as Mac OSX doesn’t do this for you. If this is the case install it through brew:

$ brew install gnupg gnupg2

Once you have this verification step set up, you need to install this public key necessary for rvm:

$ gpg –keyserver hkp://keys.gnupg.net –recv-keys 409B6B1796C275462A1703113804BB82D39DC0E3

Then you can run the command for installing rvm. If the above steps are already configures, you can skip straight to this:

$ \curl -sSL https://get.rvm.io | bash

To start using rvm, when the last command has finished running, you should see something like “* To start using RVM you need to run `source /Users/UserName/.rvm/scripts/rvm` in all your open shell windows, in rare cases you need to reopen all shell windows.” so run:

$ source /Users/UserName/.rvm/scripts/rvm

Now we need to install some rubies, as we currently will only have the OSX ruby, which requires sudo (NEVER do a sudo – if you need to sudo, something is wrong with your setup). To see available rubies:

$ rvm list

And no rubies should be installed yet.

$ rvm install ruby

To install your rubies.

$ which ruby

Shows your installed rubies – should show rubies in your user path. Now that there is an rvm ruby installed, you own it and can ‘gem-‘ install things without needing to sudo. If these steps hadn’t been done, you would have got an error saying you didn’t have access when trying to gem- install things.

Step 6 – Install compass

$ gem install compass

Installs a gem for compass.

$ npm install compass

Installs compass using npm into your node_modules.

Step 7 – Install selenium

$ brew install selenium-server-standalone

Selenium is needed for automating your web browsers for when you run your tests. If you don’t have tests or think you don’t need this, then wrong – write some tests for your code!

Step 8 – Install chromedriver

$ npm install chromedriver

A wrapper for selenium – also needed for running your tests.

Step 9 – Install Protractor

$ npm install -g protractor

We use Angular, so this is needed for running our end to end tests in the browser. If you don’t user Angular, you won’t need this. Highly recommend using Angular though – it’s awesome. This will install cl protractor and webdriver-manager.

$ webdriver-manager update

Download the binaries to get selenium running.

$ webdriver-manager start

Start up a selenium web server. You may get a pop-up requesting that you download a Java JDK to use the cli. Do this if you haven’t already done so.

Will update some more later to show how to link all this up to your projects to get them running, if you can’t figure it out yourselves 🙂

Merge Conflicts From Branch To Branch On Github

Occasionally, there will be a time when you are merging one branch into another on Github (in our case, develop into staging, as our branch hierarchy goes newBranch(es) -> develop -> staging -> master *) and although it may seem scary when that grey box appears, it isn’t difficult to fix. In the example below, we are pushing to develop from staging:

git checkout develop
git pull origin develop
git checkout staging
git status (all should be up to date).
git merge develop
git mergetool (then press 'enter', fix the conflict using the mergetool, save and close, then type 'y' when prompted).
git status (should show you the changed file ready for committing. There may be a '.orig' file duplicated of the file with the conflict - this can be deleted).
git commit -m "Fixed merge conflicts"
git push origin head

This should solve any problems, unless you’ve got a complicated merge on your hands.

* our branch structure is this way not only to avoid merge conflicts and issues, but to fit in with stakeholders’ features. Each branch has to be merged into develop then deleted. Each contributor will be pulling from develop just in case there are any changes. After develop is ready to be shown to stakeholders and test users, with stakeholder warning and approval, develop is pushed into staging. Only after the stakeholder has approved of the changes in staging can staging go into production (master). The main thing we have to be careful of with this is possible problems when the stakeholder doesn’t like a feature in staging, when someone has already pushed another new feature into develop. To avoid this, all contributors have their own branches to work on, and only push to develop when a staging feature has been approved and is being pushed to develop. All the while that they are working on their features, they are pulling from develop to stay up to date.

CSS background-position in Mobile Safari

In my most recent web-app, I have created a background image that I want to be displayed statically, taking up the whole screen and having the content scroll over the top.

Design 01a

Using the ‘background-position: fixed;’ worked fine on desktop browsers, but when it came to Safari on iPhone, this line of code became irrelevant. Safari does not accept scrolling the same way as how you would do it in a desktop browser. It thinks you are moving the whole page within a viewport and therefore the background-position tag is not relevant, as the page is moving within the viewport rather than the content scrolling within the page.

This is a wrapper to apply the CSS to as my background was in body, which seemed to have even more problems when it came to mobile Safari. This wrapper was placed inside the body.

#background_wrap {
 z-index: -1;
 position: fixed;
 top: 0;
 left: 0;
 background-size: cover;
 background-image: url('../images/compressed/background-mobile.png');
 background-repeat: no-repeat;
 background-attachment: scroll;
}
@media only screen and (max-width: 750px) {
 #background_wrap {
 z-index: -1;
 position: fixed;
 top: 0;
 left: 0;
 height: 100%;
 width: 100%;
 background-size: cover;
 background-image: url('../images/compressed/background-mobile.png');
 background-repeat: no-repeat;
 background-attachment: scroll;
 }
}

Next, the CSS code. I have created a media query for the mobile site so that the code does not impact the desktop. The desktop version currently uses the image to cover the whole screen and the background attachment works.

Screen Shot 2015-01-13 at 10.31.33 1

As I like how this looks currently, I have created 2 separate IDs so that they apply to mobile sized screens only, but you don’t have to do that.

position: fixed; background-attachment: scroll; and background-size: cover; are the main components to getting the background to look like the first image (mobile) and enable the scrolling as well. You can play around with them, but it took me a while to get to this stage without messing up other areas.

Awesome Newsletters

In the office, I get in really early to have some peace and get down to work without interruptions. On a Friday, we get the day to innovate and have some time for our own personal development. As it’s quiet in the morning, it’s good for a spot of research! There are a few newsletters that I subscribe too and some of them come out on a Friday morning (yay), so it’s good for an hour’s reading time while gaining new skills that can help me during the work week, so saving time in the long run.

There’s so many sites to subscribe to but I’ve found some really good ones with some interesting reads into UX, graphic design and front-end programming.

smashing-mag-logo

http://www.smashingmagazine.com/

These guys also have some excellent books available too. A once a week newsletter that has clear formatting and links, very easy to read. Shows aspects of UX, HTML tips and tricks and much more. My favourite one by far.

4dee564f489798451297ad839c77ad34_400x400

https://www.behance.net/

I love Behance. If you don’t have a Behance account and want a professional portfolio and somewhere to see others work, please get one. So many creatives in one place. Behance don’t send e-mails as frequently, but they share some amazing work and interesting articles. Check out my Behance portfolio: https://www.behance.net/lgoddard9

Screenshot-2014-03-28-01.08.44

http://responsivedesignweekly.com/

Responsive design is something that we’re very into right now. This publication shows how responsive design is constantly improving, the UX behind it and more. This is very good for blurring the lines between UX and Developer, so works great for me.

large_invision-logo-pink

http://blog.invisionapp.com/

Not only is the newsletter for this great (generally tutorials and interesting articles) but the app and website are also an excellent prototyping tool – would definitely recommend using this for rapid prototyping.

Excluding Events During Development and Testing in Google Analytics

A very helpful post here: http://tjvantoll.com/2012/08/28/google-analytics-excluding-visits-in-development-and-production/ After googling for an answer, finally found this. Excellent and much easier approach to not logging your own visits in Google Analytics. Our analytics are extremely inaccurate due to our developers testing our sites during development, staging and production. Rather than having to change the UA ID every single time we want to test, then having to change it back again for production, we can add the code shown in the blog to block local host from logging. I appreciate that, at first, we have to test without blocking ourselves just to check that GA itself is logging our pageviews and events (unless we are very confident), but after that we can have more valid results. Unless we carry on making another project with GA and then copy the code, it’s never going to be 100% accurate, but this method will be pretty close. Even works for the production site too: the js will just help us visit an alternate URL which will have the analytics off. We have had to do some slight changes to the code for us as follows:

if (window.location.host != 'localhost:9000') {
 ga('create', 'UA-xxxxxxxx-xx', 'auto'); //insert your tracking ID here
 ga('send', 'pageview');
 var _gaq = _gaq || [];
 _gaq.push(['_setAccount', 'UA-12345678-1']);
 _gaq.push(['_trackPageview']);
(function() {
 var ga = document.createElement('script');
 ga.type = 'text/javascript';
 ga.async = true;
 ga.src = ('https:' == document.location.protocol ? 'https://ssl' : 'http://www') + '.google-analytics.com/ga.js';
 var s = document.getElementsByTagName('script')[0];
 s.parentNode.insertBefore(ga, s);
 })();
 }

We have had to adjust the original GA code slightly so that it will not log for localhost, but still log for other addresses such as 0.0.0.0. We will investigate further for blocking this and covering all ports in case they get changed. Currently, it only covers localhost:9000 to not track data.

NOTE: This method ONLY excludes events – pageviews are still tracked. The best way to track pageviews accurately is to set up an event and then only use the data from the event for your statistics.

Unfortunately our data is already flawed due to the testing If anyone has found any other solutions that are easier or more accurate then please share!

Templates for UI Design/Prototypes

Going to post here any useful links/files for UI kits, templates etc. mainly focussed on mobile based design.

modal-folder

http://www.interfacesketch.com/ has a range of templates to print off for most mobile sizes and formats (iOS, Android, Windows etc.) https://marvelapp.com/ also has a similar selection, so a matter of preference. I personally use both.

Screen Shot 2015-01-16 at 12.21.14

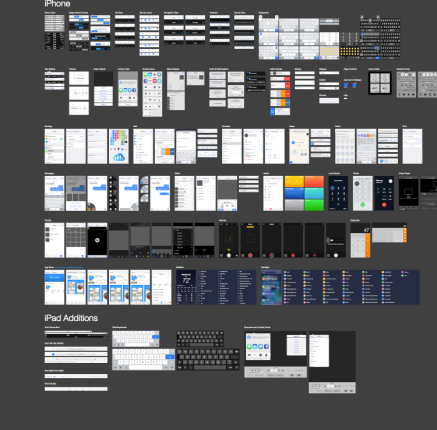
http://mercury.io/blog/ios-8-illustrator-vector-ui-kit-update is a brilliant UI Kit in Illustrator format that has now been updated to include iOS 8 components, for iPhone and iPad!

Screen Shot 2015-01-16 at 12.21.47

http://www.teehanlax.com/tools/ipad/ if Photoshop is more your style, these guys have got some lovely iOS kits too.

Screen Shot 2015-01-16 at 13.51.15

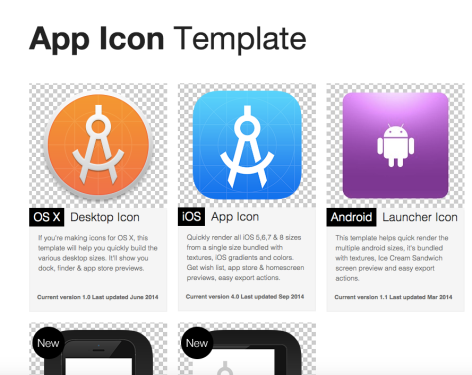
http://appicontemplate.com/ for your icons, this is the place to go. Lovely PSD templates that export all the correct sizes for your app. I personally haven’t used the Android one but all the others are quick and extremely easy to use.

Illustrator Tips & Tricks

One VERY handy thing to know: when resizing elements, ever had it so that your strokes don’t resize properly with the rest of the image?

Screen Shot 2014-12-12 at 10.11.35

If you go to Illustrator > Preferences > General

Then ensure that ‘Scale Strokes & Effects’ is checked so that when you resize, it will resize your strokes as well, solving that annoying problem of images being messed up! You’d think as we’re dealing with resizable vector images that this would be automatically on, or when items were grouped it would happen automatically, but hey ho, very simple when you know how. Have a play around with the preferences, it can really make your workflow much better.

Will publish some more tips here when I find ones that don’t seem too obvious and are useful…

Creating a Service or Controller in AngularJS

Handy to know, writing here as a note to remember:

yo angular:service myService

yo angular:controller myController

Handy to know for creating default controllers and services according to Angular. By inputting ‘yo’ you can just access to generator and set it up, or access other generators.

For bower, another handy command:

bower install packageName --save

This will install whatever package name you specify, as well as placing the installed package into the bower.json dependencies list. Saves you doing this yourself, as sometimes you may forget, your program won’t work, you spend ages looking for a solution then find that you forgot to add the dependency…so yeah, use this instead.

1714870